Several months ago I talked about using homemade deodorant in My Safe & Natural Pregnancy Beauty Routine. I have been using it for more than six months now and I love it! I even convinced my husband to give it a try and now it is all he will use. I was inspired by the recipe provided by Passionate Homemaking but decided to make my own little adjustments.
Why You Should Use Homemade Deodorant
First of all, you will save a lot of money in the long run. Mixing together a little cornstarch, baking soda and coconut oil is a heck of a lot cheaper than buying a $3 stick of deodorant. And natural brands can cost as much as $23! By making your own, you get a $23 all-natural deodorant for almost nothing.
Second, homemade deodorant means less waste and no more plastic containers spending an eternity in a landfill. There are deodorants sold in glass containers but they cost . . . $23. You can also try those nifty crystal deodorants but I have yet to find one that does not come at least wrapped in plastic.
Third, you can feel confident about what ingredients are in your deodorant. Most conventional deodorants contain aluminum and parabens, which have been linked to breast cancer. Even “natural” deodorants often contain at least one toxic ingredient. If you do choose to buy deodorant, make sure to check the label and look up any unknown ingredients on the Skin Deep database.
Fourth, you will completely avoid that horrible stale smell that conventional deodorants sometimes cause. My husband had to constantly switch brands because each one would stop working after several months.
Difficulties with Homemade Deodorant
Given all of the benefits of making your own deodorant, the negatives are not so bad. In fact, the only thing I can really complain about is that the recipe I use is not an anti-perspirant. Which means that you will still sweat. But the sweat has no smell. I have even found that I do not sweat nearly as much as I used to – as if my armpits were sweating to push out all of the nasty stuff that I kept rubbing on them. If you cannot stand having wet armpits, stick to the conventional stuff. I haven’t even found a store-bought natural brand that will control sweating.
About this Recipe
A couple of notes about this recipe:
- The amount of coconut oil you use depends, in part, on how you like to apply your deodorant. I prefer to to rub it on with my fingers so I add a little more oil so that it is nice and soft. But if you want to try to reuse an old deodorant applicator, then you may want your deodorant to be harder and therefore you should use less oil.
- If you keep your house pretty warm, use less coconut oil. If you keep it cold, use more. Our house is pretty warm so the deodorant stays soft. But we recently went to stay at a relative’s house that was about 5 degrees colder than ours and my deodorant was as hard as rock. You can also easily warm it up by working a small amount between your fingers.
- Experiment with different essential oils. Tea tree oil is supposed to have antiseptic properties and be effective with controlling odors. Lavender has a pleasant soothing smell. Cinnamon oil might be nice if you like warmer smells.
- If you are pregnant or trying to get pregnant, be careful about using essential oils. I have been keeping mine fragrance-free, just in case!
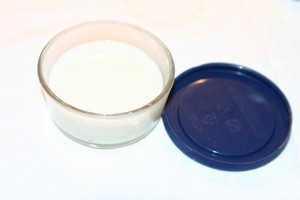
- I store my deodorant in a small pyrex bowl. You can also reuse old deodorant containers or baby jars.
- When you are using coconut oil, it tends to solidify. Just stick the whole jar in a bowl full of warm water to help it get back to its liquid state.
The Recipe
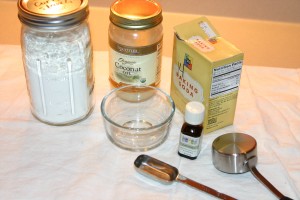
The best part about this recipe is that it is so simple. You need the following ingredients:
- 1/4 cup baking soda
- 1/4 cup cornstarch (or arrowroot powder)
- 4-6 tablespoons of coconut oil
- 5-10 drops of essential oil (I like tea tree oil or lavender oil) (optional)
Just mix together the baking soda and cornstarch and then add the coconut oil and essential oil. I would start with 4 tablespoons and then gradually add additional tablespoons until the consistency looks good to you. One thing to keep in mind is that the mixture does solidify over time. Mine is more liquid than solid when I make it but, by the next day, it is perfect.
Enjoy!
NOTICE: Blog posts on OnePartSunshine.com may contain affiliate links. In other words, if you buy something after clicking on a link in this post, then the author might receive an affiliate commission. Also, I am not a doctor. Please consult a healthcare professional if you have any questions or concerns about anything in this posting or on the site in general. If you are pregnant, check with a health care professional before using any essential oils.


